Innovation and Efficiency for 3D Metrology
Park Systems has introduced the revolutionary Park 3DM Series, the completely automated AFM system designed for overhang profiles, high-resolution sidewall imaging, and critical angle measurements. With the patented decoupled XY and Z scanning system with tilted Z-scanner, it overcomes the challenges of the normal and flare tip methods in accurate sidewall analysis. In utilizing our True Non-Contact Mode™, the Park 3DM Series enables non-destructive measurement of soft photoresist surfaces with high aspect ratio tips.
A fully automated industrial AFM using NX technology
- Clean room compatible and fully automated for measurement and data analysis at the nanoscale level
- NX technology automatically constructs an extremely accurate topographical image and collects essential dimensional data
- The Industry leading,low noise Z-detector works on an independent, closed loop to minimize errors in topography (the “creep effect”)
- True Non-contact™ mode allow for the collection of high resolution and accurate data without tip-sample damage, something that could otherwise cost you valuable time and money
Innovative head design for undercut and overhang structures
- Z-head’s unique sideways orientation allows access to the undercut and overhang structures of photoresist and other industrial material
- Patented decoupled XY and Z scanning systems work together with the tilted Z-scanner, letting users overcome normal challenges in accurate sidewall analysis associated with normal and flare tip methods
- Sidewall trench line profile, roughness, critical angle and critical dimension can all be measured using the NX-3DM
- Z-head tilting mechanism allows access to the sidewalls using an ultra-sharp tip to obtain the same high resolution and definition as is obtained over the rest of the material
A Reliable, Seamless Measurement Tool for 3D materials
- No sample preparation (eg. cutting, mounting or coating) is required to obtain the sidewall roughness or critical dimension measurements in this process
- By utilizing Z-head tilting and True Non-contact™ mode, the NX-3DM allows for both tip-preserving and high resolution collection of sidewall data
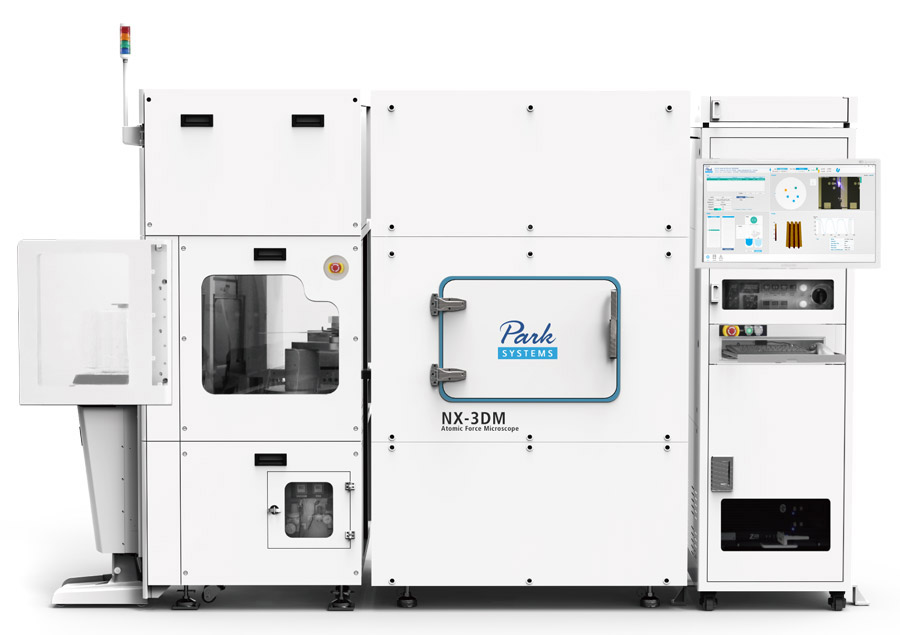
A revolutionary all-in-one system for 3D Metrology
Automatic Tip Exchange (ATX)
The ATX automatically locates tips by pattern recognition and uses a novel magnetic approach to disengage a used tip and pick up a new tip, with an incredible 99.9% success rate. The laser spot is then automatically optimized along the X- and Y-axis by motorized positioning knobs.
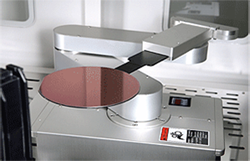
Automatic Wafer Handler (EFEM or FOUP)
The NX-3DM can be configured for various automatic wafer handlers, such as EFEM and FOUP. The high-precision, robotic handling arm ensures users get fast and reliable wafer measurements every time.
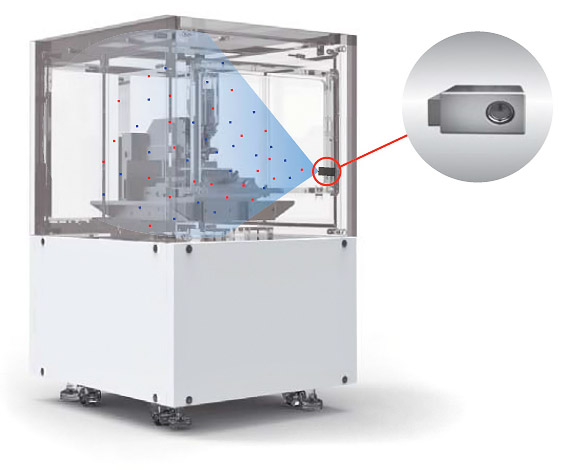
Ionization System for a more stable scanning
Our innovative ionization system quickly and effectively removes electrostatic charges in the sample’s environment. Since the system always generates and maintains the ideal balance of positive and negative ions, it can create an extremely stably charged environment with negligible contamination from the surrounding area and minimize the risk of accidental electrostatic charge during sample handling.
Park NX-3DM Specifications
System
Specification
Motorized XY stage
200 mm: travels up to 275 mm × 200 mm,
0.5 μm resolution
300 mm:travels up to 400 mm × 300 mm,
0.5 μm resolution, < 1 μm repeatability
Motorized Focus Stage
9 mm Z travel distance for on-axis optics
Motorized Angle Range
-19 degrees and +19 degrees
-38 degrees and +38 degrees
< 0.5 degree angle repeatability
Motorized Z Stage
27 mm Z travel distance
0.08 μm resolution
< 1 μm repeatability
Z Scanner
Z Scanner Range: 15 μm (large mode)
2 μm (small mode)
Z Scanner Resolution: 0.016 nm (large mode)
0.002 nm (small mode)
Z Scanner Noise Floor: < 0.05 nm
Z Scanner Detector Noise: 0.03 nm, rms (typical)
COGNEX Pattern Recognition
pattern align resolution of 1/4 pixel
Scanner Performances
XY Scanner
Single-module flexure XY scanner with closed-loop control
100 µm × 100 µm (Large mode)
50 µm × 50 µm (Medium mode)
10 µm × 10 µm (Small mode)
XY Scanner Resolution
0.28 nm (Large mode)
0.03 nm (Small mode)
Facility Requirements
Room Temperature (Stand By)
10 °C ~ 40 °C
Room Temperature (Operating)
18 °C ~ 24 °C
Humidity
30% to 60% (not condensing)
Floor Vibration Level
VC-D (6µm/sec)
Acoustic Noise
Below 65 dB
Pneumatics
Vacuum : -80 kPa
CDA (or N2): 0.7 MPa
Power Supply Rating
208V - 240 V, single phase, 15 A (max)
Total Power Consumption
2 KW (typical)
Ground Resistance
Below 100 ohms
Options
Automatic Tip Exchange (ATX)
Automatic Tip Exchange performs fully automated tip exchanges in order to seamlessly continue automated measurement routines. It automatically calibrates cantilever location and optimizes measurement settings based on measurements of a reference pattern. Our novel magnetic approach to the tip exchange yields a 99% success rate, higher than the traditional vacuum techniques.
Automatic Wafer Handler (EFEM or FOUP)
The XE-3DM can be further customized by adding an automatic wafer handler (EFEM or FOUP or other). The high-precision, nondestructive wafer handler robot arm fully ensures XE-3DM users to receive fast and reliable wafer measurement automation.
Ionization System
Ionization system effectively removes electrostatic charges. It ionizes the charged objects and is very reliable since the system always generates and maintains an ideal balance of positive and negative ions without causing any contamination to the surrounding area. It also reduces the accidental electrostatic built-in charge that may occur during sample handling.
Dimensions & Weight
200 mm System
1500 mm(w) × 980 mm(d) x 2050 mm(h)
w/o EFEM, 1020 kg approx. (incl. Control Cabinet)
2465 mm(w) × 1000 mm(d) x 2050 mm(h)
w/ EFEM, 1230 kg approx. (incl. Control Cabinet)
Ceiling Height
2500 mm or more
Operator Working Space
3300 mm (w) x 2300 mm (d), Minimum
300 mm System
1840 mm(w) × 1170 mm(d) x 2050 mm(h)
w/o EFEM, 1320 kg approx. (incl. Control Cabinet)
3260 mm(w) × 1350 mm(d) x 2050 mm(h)
w/ EFEM, 2120 kg approx. (incl. Control Cabinet)
Ceiling Height
2500 mm or more
Operator Working Space
4540 mm (w) x 2850 mm (d), Minimum
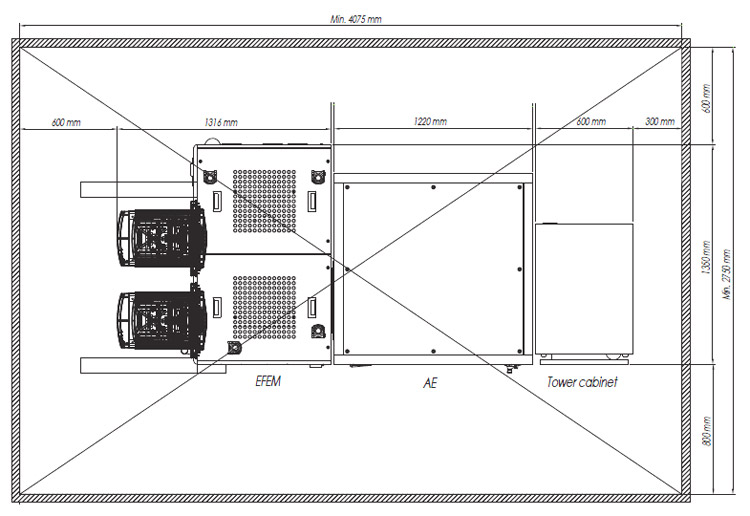 [ Park NX-3DM 300mm installation layout ]
An innovative 3D metrology solution
Undercut and Overhang Profiling
The NX-3DM allows unique access to the undercut and overhang structures of photoresist and other industrial materials, ensuring users receive accurate topographical data throughout the entire sample.
Read More related application.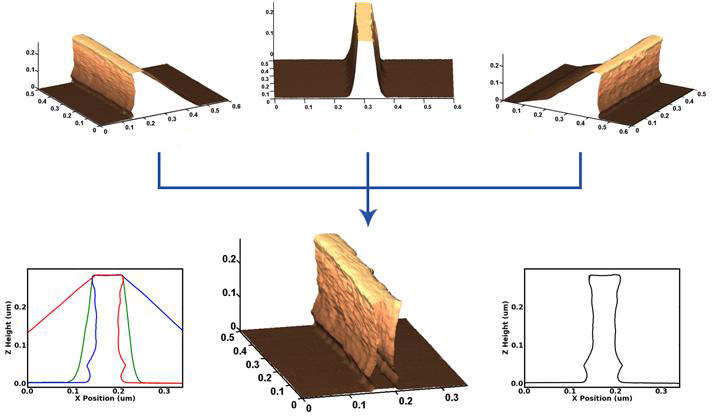
Critical Dimension Measurement
True Non-contact mode enables instrument and subject-preserving CD measurement without sacrificing image fidelity.
Read More related application.
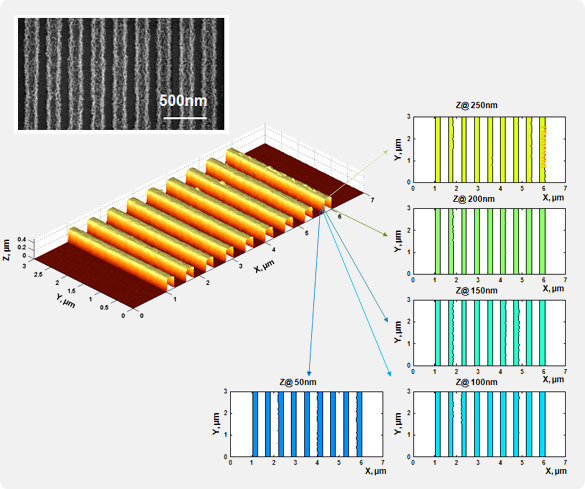
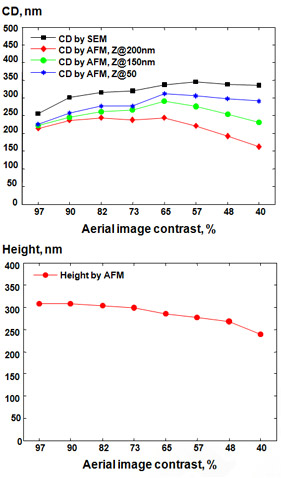
Sidewall Roughness Measurement
The NX-3DM’s innovative head tilting design allows access to the sidewalls using an ultra sharp tip to obtain high resolution, well-defined details of the area and its roughness. Innovative head tilting design allows access to the sidewalls using ultra sharp tip to obtain high resolution and(more defined)details of the side wall roughness.
Read More related application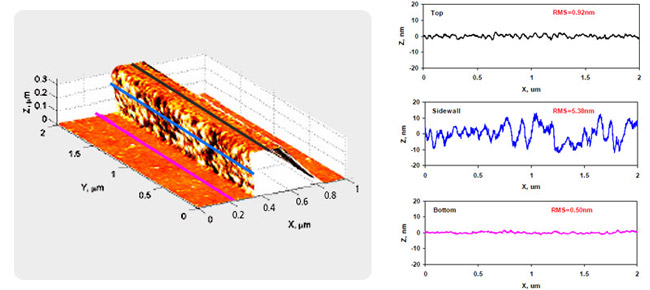
Park 3DM features
Innovative Z-Scan System
The many unique features of the NX-3DM are made possible by independently tilting the Z-scanner in its patented Crosstalk Eliminated platform, where XY and Z scanners are completely decoupled. This design allows users to access the vertical sidewalls as well as theundercut structures at various angles. Unlike in systems with flared tips, here high resolution and high aspect ratio probes can be used.

Flexure-Guided XY Scanner with Closed-loop Dual Servo System
The 100 μm x 100 μm XY scanner consists of a symmetrical 2-dimensional flexure stage and high-force piezoelectric stacks that provide highly orthogonal movement with minimal out-of-plane motion, as well as the high responsiveness essential for precise sample scanning at the nanometer scale. Two symmetric, low-noise sensors are present on each axis of the XY scanner to retain a high level of orthogonality in the context of large scanning ranges and sample sizes. The secondary sensor corrects and compensates for non-linear and non-planar positional errors which might occur using a single sensor alone.
Automatic Measurement Control for Increased Efficiency
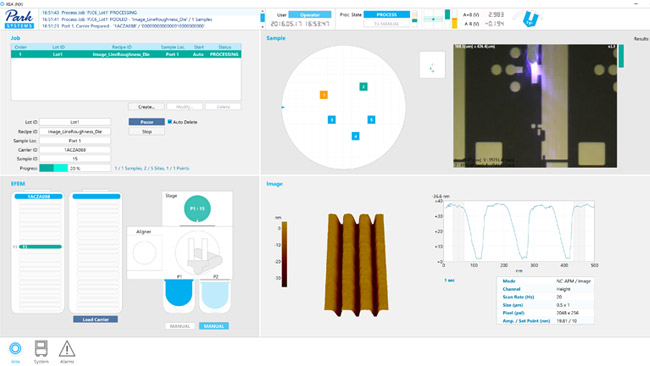
The NX-3DM is equipped with automated software that makes operation seamless. Just select the desired measurement program to get precise multi-site analysis and auto-optimized settings for cantilever tuning, scan rate, gain, and set-point parameters. Park's user-friendly software interface gives you the flexibility to create customized operation routines so you can make the most of the NX-3DM with the least amount of effort. Creating new routines is easy. On average it takes only 10 minutes to make a new routine, and less than 5 to modify an existing one.
Industry Leading Low Noise Z Detector
Our AFMs are equipped with the most effective low noise Z detectors in the field, with a noise of 0.2 Å over large bandwidth. This produces highly accurate sample topography, no edge overshoot and no need for calibration. Just one of the many ways Park NX-3DM saves you time and gives you better data.
Accurate Sample Topography Measured by Low Noise Z Detector
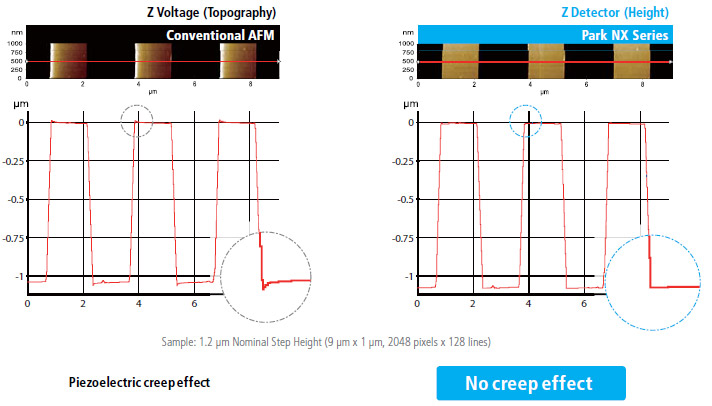
No artifact by AFM scanner in low noise closed-loop topography

• Uses low noise Z detector signal for topography
• Has low Z detector noise of 0.02 nm over large bandwidth
• Has no edge overshoot at the leading and trailing edges
• Needs calibration done only once at the factory
Industry’s Lowest Noise Floor
To detect the smallest sample features, and image the flattest surfaces, Park has engineered the industry’s lowest noise floor specification of < 0.5 Å. The noise floor data is determined using a “zero scan.” The system noise is measured with the cantilever in contact with the sample surface at a single point under the following conditions:

Gauge Repeatability and Reproducibility
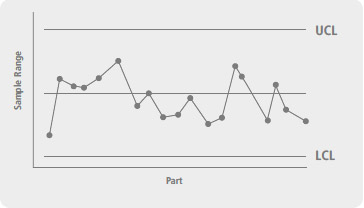
Due to the ever-decreasing size of components, manufacturers now require the highest level of quality control. Park AFM can provide 1 gauge sigma of less than 1 angstrom.
Tool-to-tool Correlation
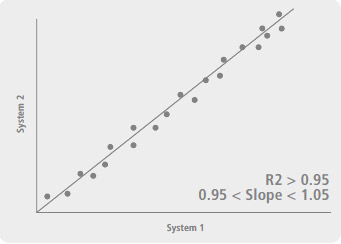
Thanks to Park's revolutionary AFM platform designed for industrial metrology, Park NX-3DM will correlate with any existing Park AFMs that have been previously used for manufacturing, inspection, analysis, or research.
